 Pin it
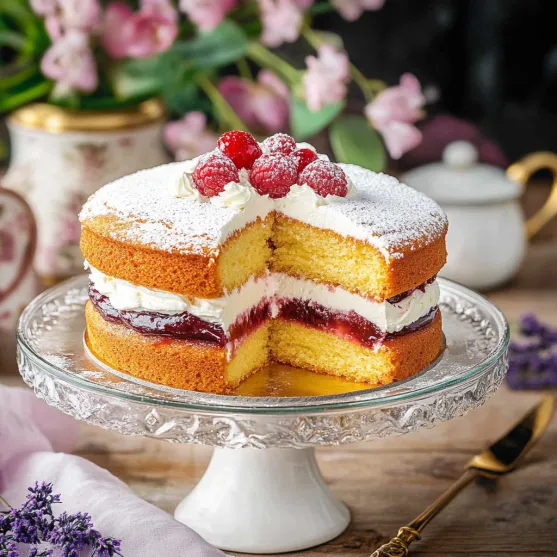
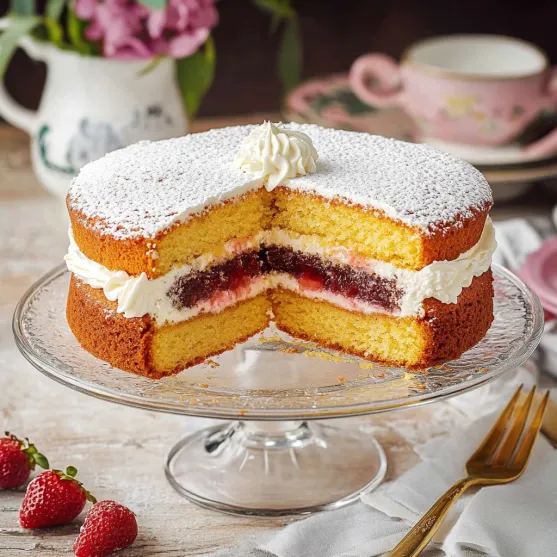
A perfect Victoria sponge takes you straight to the heart of British baking tradition. This double-layered delight sandwiches fresh whipped cream and sweet strawberry jam between two golden, butter-rich sponges that simply melt in your mouth. Its elegant simplicity makes it a showstopping centerpiece for any occasion.
Last week, I made this cake for my neighbor's birthday gathering. The way everyone's faces lit up at first bite reminded me why this classic never goes out of style. One guest even asked if I'd studied at pastry school - that's how foolproof this recipe is!
Essential Ingredients
- Self-rising flour (2 cups): Sifted twice for the most delicate crumb. Look for a trusted brand and check the expiration date
- Unsalted butter (1 cup): Choose European-style for its higher butterfat content. The butter should be soft enough to leave a slight indent when pressed
- Large eggs (4): Farm-fresh gives the best flavor and that gorgeous golden color. Take them out of the fridge an hour before baking
- Caster sugar (1 cup): Its fine texture helps create that signature melt-in-your-mouth quality
- Pure vanilla extract (2 tsp): Skip the artificial stuff; real vanilla makes all the difference
- Heavy whipping cream (1 cup): The higher the fat content, the better it holds its shape
- Quality strawberry jam (3/4 cup): Look for one with visible fruit pieces or make your own when berries are in season
Instructions
- Prepare Your Space and Ingredients
- Clear your countertop and gather all ingredients
- Line two 8-inch round cake pans with parchment circles
- Generously butter the pans, including the sides
- Ensure butter, eggs, and milk are at room temperature
- Preheat oven to 350°F (175°C), positioning rack in the center
- Create the Perfect Batter
- Start by beating butter until it lightens in color (about 3 minutes)
- Gradually add sugar while beating continuously
- Keep beating until mixture becomes noticeably fluffier and lighter (about 5 minutes)
- Add eggs one at a time, beating for 30 seconds between each addition
- If mixture starts to curdle, add a tablespoon of flour
- Gently fold in flour using a large metal spoon, cutting through the mixture rather than stirring
- Add vanilla and fold just until batter looks silky and smooth
- Baking Process
- Divide batter evenly between prepared pans
- Tap pans gently on counter to remove air bubbles
- Smooth tops with an offset spatula
- Place pans in preheated oven, leaving space between them
- Bake for 20-25 minutes, rotating pans halfway through
- Test with a skewer - it should come out clean
- Let cool in pans for 10 minutes before turning out
- Perfect Your Filling
- Chill mixing bowl and beaters in freezer for 10 minutes
- Pour cold heavy cream into chilled bowl
- Beat until soft peaks form
- Add vanilla and powdered sugar, continuing to beat until medium-firm peaks form
- Warm jam slightly in microwave for easier spreading
- Strain if needed to remove any fruit chunks
- Assembly with Care
- Place first layer bottom-side up on serving plate
- Spread jam evenly, leaving 1/2-inch border
- Pipe or spread whipped cream over jam
- Place second layer top-side up
- Dust generously with powdered sugar
- Chill for 30 minutes before serving
 Pin it
I remember my grandmother's trick of warming the eggs in a bowl of warm water when she forgot to take them out early. She'd always say "A rushed cake is a ruined cake" - wisdom I still follow today.
The Art of Perfect Timing
Getting the timing right transforms this cake from good to exceptional. I've learned through countless batches that patience during mixing and careful attention during baking makes all the difference.
Seasonal Adaptations
While strawberry jam is traditional, I love experimenting with seasonal variations. Raspberry jam in summer or blackberry preserves in autumn bring delightful twists to this classic.
Serving Suggestions
This cake pairs beautifully with Earl Grey tea or, for special occasions, a glass of prosecco. I often serve it slightly chilled in summer, which firms up the cream filling perfectly.
Storage Success
Keep your Victoria sponge fresh by storing it in an airtight container in a cool spot, but not the refrigerator. The cake will stay perfect for up to three days, though it rarely lasts that long in my house!
After years of baking this treasured recipe, I've come to appreciate its elegant simplicity. It's a reminder that sometimes the most straightforward combinations create the most memorable results. Whether you're baking for a special celebration or a quiet afternoon treat, this Victoria sponge never disappoints.
Tea Time Traditions
The Victoria sponge has long been the centerpiece of proper British afternoon tea. I've hosted countless tea parties where this cake takes pride of place, surrounded by dainty sandwiches and steaming cups of Earl Grey.
Perfect Occasions
Beyond traditional tea time, this cake has graced birthday celebrations, wedding showers, and casual Sunday gatherings. Its versatility makes it appropriate for any occasion - I've even served it at garden parties where its light texture perfectly matches the outdoor setting.
Temperature Matters
The perfect serving temperature can make a significant difference. In warmer months, I chill the assembled cake for an hour before serving, which firms up the cream and makes slicing cleaner. In winter, I let it sit at room temperature for that melt-in-your-mouth quality.
Troubleshooting Tips
- If your cake sinks in the middle, your oven door might have been opened too soon
- Curdled batter can be rescued by adding a spoonful of flour
- Lumpy batter often means the butter wasn't soft enough at the start
My daughter had her first baking success with this recipe, and watching her confidence grow with each perfect cake reminds me why sharing these traditional recipes matters so much.
